Almost every caller with rats in the attic has already made peace with one idea: you can chase them out, but they’ll always come back. Miriam, who answers every call that comes into our office, hears it more than any other belief about rodents. It isn’t true. Once we’ve sealed and cleaned an attic, it’s rare for a customer to call and tell us the rats are back.
The belief didn’t come from nowhere, though. A lot of East Bay homeowners have paid for rodent work that didn’t hold, and the cold months are when they tend to find out, because that’s when rats move indoors looking for warmth. When a job fails, it tends to fail for the same few reasons. Every one of them is fixable.
Why do rats in the attic keep coming back?
Start with the animal. The rat living over your ceiling is usually a roof rat, and according to the University of California’s Pest Notes on rats, roof rats nest in attics, wall voids and ceiling voids, are agile climbers, and routinely travel 300 feet or more for food. They run along utility lines and fence tops at night. They love ivy, star jasmine, and the citrus and avocado trees in older Bay Area yards. So a rat that lives in the neighbor’s hedge can eat your oranges and sleep in your attic, and the only thing that decides whether it gets in is the outside of your house.
That’s why the fix is structural. UC IPM calls exclusion, or “building them out,” the most successful and longest-lasting strategy for rats around a building. The Alameda County Vector Control Services District goes further on its rodent page: rodent-proofing a structure is the only solution that keeps rodents out for the long term. When exclusion fails, it’s because one of the four things below went wrong.
The gaps were filled with something rats can chew
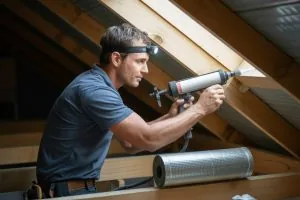
Spray foam looks like a seal. To a rat it’s a snack. UC IPM lists plastic, foam, wood and caulk as materials rats chew straight through, and a hole plugged with foam alone is usually open again within a season. We set galvanized mesh wire into every opening first, because their teeth can’t get through it, then finish over the mesh with foam so the repair is clean and tidy. The mesh does the work. The foam just makes it look good.
An entry point got missed
The openings that matter are small. The CDC’s seal-up guidance says a mouse fits through a hole the width of a pencil, 1/4 inch, and UC IPM says a young rat can squeeze under a door with a 1/2-inch gap. You won’t spot those from the driveway, and you won’t spot all of them with a flashlight pointed through the crawl space hatch either.
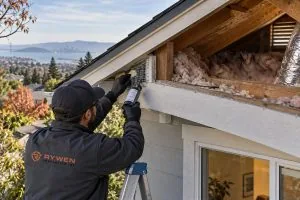
We’ve followed other inspections that lasted ten minutes from the access door. Ours takes 40 to 60 minutes, starts outside at the garage door, the vents and the roof eaves, then goes through the attic and the crawl space on hands and knees. Rats come from outside. They don’t just appear, so the outside is where the search begins.
The old insulation stayed in the attic
This is the one most people don’t expect. Insulation that rats have nested in is soaked with urine and droppings, and it keeps telling every rat in the neighborhood that this attic is a warm, safe place to live. UC IPM notes that roof rats have strong nest site affinity, and that if nest sites aren’t removed, the rats will return to the site. You can seal every gap and still have rats working the roofline for months, trying to get back to that smell. The nest has to go.
Miriam tells customers that pulling out the contaminated insulation is how we send the rats an eviction notice. She’s right. It’s also why we do the cleanup and the sealing as one job. When they’re split between two companies, the new insulation sometimes goes in before the sealing is finished, and the homeowner ends up paying for it twice. Our attic and crawl space cleaning page walks through how that removal works.
Only half the house got sealed
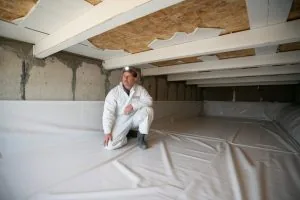
When roof rats and Norway rats share a building, UC IPM says the Norway rats take the ground floor and the roof rats take the upper floors. Seal the attic and leave the crawl space open, and the rats move downstairs. Foundation vents, the crawl space door, and the gaps where gas, water and electrical lines come through the wall all need the same treatment as the roofline. Both floors, every time.
Here’s what a rodent proofing job that lasts looks like
Here’s the order we work in, and why the order matters.
- Inspect and photograph everything. Our crew takes 50 to 100 photos on a typical job, before and after, and sends them with your receipt. You’re never going to crawl around your own attic, so the photos are how you check our work. Think of a mechanic who shows you the worn part instead of asking you to trust him.
- Pull out the contaminated insulation. Rats don’t like having people around, so the activity clears out fast once the crew is working and the attic is empty.
- Clean and sanitize. We use a non-toxic solution, and the smell of it pushes out anything still hiding. You can stay in your home for the whole project. There’s some noise during insulation removal, but no toxic chemicals.
- Seal every opening. The standard we hold our crews to is simple: if a sheet of paper could slip through it, it gets sealed, with mesh wire first and foam over it.
- Install new insulation. Some customers want to wait a week or two first, to be sure the seal is holding before fresh insulation goes in. That’s fine with us.
- Come back a week later. Tony, our quality inspector, goes through every area we worked on, looking for a single dropping. If he finds anything unusual, we’re back the following week, and we keep coming back until he signs off.
The work is guaranteed. If a rat ever finds a new way in during the guarantee, we come back and take care of it. The full details are on our rodent proofing and wildlife exclusion page.
Cleaning up droppings yourself? Read this first
If you’re going to clean up a garage shelf or a closet floor yourself, the CDC’s rodent clean-up instructions are worth following exactly. Gloves first. Don’t sweep or vacuum droppings, because that puts tiny particles into the air you’re breathing. Open the doors and windows for 30 minutes first and leave while it airs out. Spray the droppings and urine with disinfectant or a bleach solution until they’re very wet, let it soak for 5 minutes, then wipe it up with paper towels.
Blown-in insulation is a different job. A household vacuum spreads exactly the dust the CDC is warning about, which is why our crews remove it with commercial equipment that has HEPA filtration and bag the rest by hand.
What if another company’s rodent proofing failed?
Call them first. Miriam asks every caller in this spot two questions: how long ago was the work done, and is there still a warranty? If the warranty has run out, or the company has stopped calling back, or they keep coming out and the noise keeps coming back, we’ll send someone over for a free evaluation of what was done and what was missed. Most of the time the answer is one of the four problems above. And the poisons that used to cover for a weak seal are mostly gone now, as we explained in our post on California’s rat poison restrictions, so the seal has to be right.
Here are quick answers to what we hear most
Do I need to replace all of my insulation after rats?
Not always. It depends on how long they’ve been there and how far the nesting spread. We can tell you after the inspection, and the photos will show you why.
Do you use poison?
No. We don’t use poison or toxic chemicals. We’re a rodent proofing and insulation company, and our work is sealing, cleanup and new insulation.
What do I need to do to get ready?
Nothing. The crew wears booties, covers your floors, and cleans up before they leave.
We’re a family business in San Leandro. Our own crews do this work in Oakland, Berkeley, Hayward and across the East Bay. If you’re hearing scratching overhead at night, book a free inspection or call us at (415) 770-0342. Nobody should have to fall asleep listening to a rat walk across the ceiling.